Categories

Asian (9) Baking (29) Barbecue (3) Barley (2) Beans (8) Beef (13) Bread (9) Breakfast (12) Burger (3) Cake (8) Casserole (32) Chicken (70) Chili (8) Chocolate (9) Cookies (7) Crock Pot (15) Cupcakes (4) Dessert (21) DIY (2) Fried (14) Frosting (3) Fruit (10) Grilled (5) Ground Beef (21) Holiday (6) Italian (43) Lunch (11) Main Dish (131) Marinade (6) Meal Plan (125) Mexican (17) Miscellaneous (14) Muffins (1) Oatmeal (6) Pasta (53) Personal (13) Pie (4) Pizza (5) Pork (13) Potatoes (18) Ranch (4) Recipe Round-Up (2) Rice (10) Roasted (14) Salad (6) Sandwich (7) Sauce or Gravy (4) Sausage (17) Seasoning (8) Sides (26) Skillet (16) Slow Cooker (15) Smoothie (1) Snacks (3) SNAP Challenge 2014 (9) Soup (16) Spicy (8) Turkey (6) Vegetables (24) Wish Come True (6) Wishlist (10)
Showing posts with label Chicken. Show all posts

Wednesday, September 30, 2015

Chicken Fajita Stuffed Peppers


I was never a fan of stuffed peppers when I was younger. Every stuffed pepper I ever tried was overcooked and under-seasoned. Bell peppers weren't my favorite food to begin with and it didn't help matters any to fill them with bland, grainy ground beef and mushy rice.

In recent years I've come to appreciate bell peppers more. Through Subway I learned that they're delicious on a turkey sandwich or a salad and thanks to Rachael Ray I can now enjoy them in a variety of soups and sauces. Bell peppers are one of Bailey's favorite snacks. She likes them raw and cut into chunks but she will also eat them whole with stem and seeds intact if I don't stop her in time.

Stuffed peppers were still high on my "never gonna make it, ever!" list until a few months ago when I discovered this recipe through one of the blogs I follow. It was as if a switch was flipped in my head and ideas just flooded in... or would that be out? I'm not sure, but either way I was struck by a tsunami of ideas.

The first was:

Look at that! They stuffed the peppers with chicken. I like chicken.

Followed by:

And if I used brown rice and cooked it just under done it wouldn't be as mushy.

And then:

Oh! If I can use chicken, why not substitute a little steak? Make it a steak fajita stuffed pepper! That would be so yummy!

Which of course led to these thoughts:

I bet that Philly steak stuffed pepper with the provolone would be amazing. I could leave out the onions.
Hey, while I'm at it I could do a Philly chicken pepper too.
And I could do them vegetarian too! I wonder if anyone has ever made a broccoli cheddar stuffed pepper...

You can see where this is going. It was like a blogging brainstorm party in my head. My final list totaled over twenty ideas for stuffed peppers, including a roast beef and gravy pepper (shepherd's pie style with mashed potatoes on top) and a chicken Parmesan pepper. Perhaps a few of my ideas were stretching it a bit, but they all sounded tasty to me. Who knows? I might have just thought up a new food trend.

This filling recipe is perfectly balanced. The chicken:rice:other ingredient ratio is just right. There's a little punch of heat from the green chilies in the tomatoes but it's not an overwhelming spiciness. Brown rice stands up nicely without turning mushy. The chicken is a much more pleasant texture than ground beef.

I did adjust a few things. First, I added another whole pepper. The filling recipe made more than enough for the five peppers. I also upped the cheese to two whole cups. There's nothing wrong with cutting down the amount of cheese to a tiny sprinkling on each pepper, but I like cheese... a lot! Especially on anything with chili powder.

I made these with all green peppers the first time but I preferred the flavor of the red, orange, and yellow peppers this time. Since the peppers are the expensive part of this meal I'd say just use what you can find on sale (or beg from your neighbor's garden... guilty!) and get cookin'! Cause these peppers are absolutely deeeee-lish!

Chicken Fajita Stuffed Peppers

Source: Cooking Classy

3/4 cup dry brown rice, cooked
6 medium bell peppers, any color
1 tsp salt
1 tsp chili powder
1 tsp ground cumin
1/4 tsp paprika
1/4 tsp pepper
2 Tbsp olive oil
1 lb chicken, diced
1 medium onion, finely diced
2 cloves garlic, minced
1 (10 oz) can diced tomatoes with green chilies
1 (15 oz) can black beans, drained and rinsed
1 cup frozen corn
1 Tbsp fresh lime juice (optional)
3 Tbsp fresh cilantro, chopped (optional)
2/3-2 cups monterrey jack or cheddar cheese, shredded (your choice how much you want to use)
sour cream and hot sauce to serve (also optional)


Begin by starting to cook the rice. You can follow the directions on the package but I like to use the pasta method. Just fill a 2-quart pot with water (far more water than the directions call for), bring it to a boil, add the rice and some salt and cook for 45-50 minutes. When the rice is done drain and rinse in a fine mesh strainer.

Fill a large pot with water and bring to a boil.


Take your peppers and slice them all in half.


Remove the ribs and seeds but leave the stem intact.


Place the pepper halves 3-4 at a time in the boiling water and cook for 5 minutes.


After five minutes use a pair of tongs to remove and drain the peppers. Place them on a baking sheet (lined with foil if you remember... I forgot this time).


Meanwhile in a small bowl combine the salt, chili powder, ground cumin, paprika, and pepper.


Once you've finished boiling the peppers pour the water out and place the pot back on the stove. Add the oil and heat on medium-high. Once the oil is hot add the chicken.


Add the seasoning mix and stir to combine.


Add the onion and cook for about 10 minutes, until the onion starts to turn translucent.


Once the onion is mostly cooked add the garlic and cook just until fragrant, about 1 minute.


Add the diced tomatoes and green chilies, black beans, and frozen corn.


Stir to combine and cook just until the ingredients are warmed through.


Once the rice is cooked and drained add it and the lime juice and cilantro to the chicken mixture and stir to combine.


Preheat the oven to 375 degrees. Fill each of your prepared peppers with the filling mixture to heaping full.


Sprinkle the cheese over the peppers and bake at 375 degrees for 30-35 minutes.


Remove from the oven when the cheese is brown and bubbly.


Serve warm with sour cream and hot sauce if desired.

Wednesday, September 23, 2015

Cheesy Chicken and Stuffing


Did you know that I don't eat dressing or stuffing at Thanksgiving? There's something about the soggy bread that just does not appeal to me. That being said, the stuffing mix that you buy at the store is pretty fantastic. You can make some awesome meals with it.

This recipe caught my eye on Pinterest because of its simplicity. You just layer all of the ingredients in the baking dish and bake it until it's done. I wanted to try it because I thought, Hey! Another easy meal for busy nights. Thankfully the recipe turned out spectacularly well. I've made it a total of three times and decided to keep the ingredients on hand for particularly hectic nights.

I had a moment while making this meal where I actually had nothing to do but wait for things to cook. That rarely happens. Usually I'm running around like a crazy person trying to get everything to finish cooking at the same time. I had the chicken in the oven, the potatoes were boiling, the water was coming to a boil for macaroni and cheese, and the green beans were bubbling away. I stood in the middle of Aaron's mother's kitchen wondering what did I do right?

What do you get with this recipe? How about tender, moist chicken with a creamy, cheesy sauce and a crispy bread topping. The extra sauce and stuffing make an excellent topping for mashed potatoes and the whole meal has a very country, home-cooking flavor.

Cheesy Chicken and Stuffing

Source: Or so she says...

3-4 boneless skinless chicken breasts, cut in half as evenly as possible
6-8 slices cheese (I used cheddar but pretty much any cheese will work)
1 (10-oz) can cream of chicken soup
1/4 cup milk
1 box chicken stuffing mix (like Stovetop)
1/4 cup butter, melted

Preheat the oven to 350 degrees and spray a 9x13 baking dish with vegetable oil spray.


Place the chicken pieces in the bottom of the pan in an even layer.


Top the raw chicken with the cheese slices.


In a small bowl combine the cream of chicken soup and milk. Mix until smooth and then pour the mixture over the cheese.


Sprinkle the stuffing mix evenly over the soup mixture (yes, dry) and drizzle the butter evenly over the stuffing mix.


Place the baking dish in the oven and bake for 45-60 minutes, until the chicken is cooked through.


Serve warm with mashed potatoes or rice.

Monday, September 21, 2015

Creamy Chicken and Rice


In the summer, when our garden (or in our case our neighbor's garden) is rewarding hard work with the best homegrown vegetables available, I always seem to have a plethora of zucchini. We were brought an entire grocery bag of zucchini twice a week for nearly three weeks. We sauteed them with onions, added them to stir fry, and even turned a whole load of them into many loaves of zucchini bread, but this was probably my favorite use of all.

The recipe didn't call for zucchini, just carrots and onion in the way of vegetables. But I already had some extra zucchini already grated from the zucchini bread and thought, why not? It made a fantastic addition, but if you don't have any zucchini this dish would still be wonderful without it.

It's no secret how fond I am of rice. Perhaps because it's such a rare treat for me. I usually like rice on the side of Tex-Mex dishes and with Asian inspired meals but this is really more like an Italian risotto. It's a creamy mixture of chicken, vegetables, aromatic Jasmine rice, and Parmesan cheese. This is another one-pot meal, limiting clean up and coming together in less than an hour. I might not use chicken thighs next time as I found it difficult to remove the fat and I don't think the dish would lose any flavor if the thighs were swapped for breast meat. If you're looking for a bit more green you could add some fresh baby spinach leaves, chopped asparagus, or even some steamed broccoli.

I skipped the wine that the recipe calls for. I know it would have probably added some depth but I knew Nana would prefer it without so I just substituted extra chicken broth in place of the wine. Maybe next time I'll run by the liquor store and grab a bottle of good dry white.

The flavors of this dish are homey and fresh. It's sure to be a crowd pleaser in almost any home.

Creamy Chicken and Rice

Source: Natasha's Kitchen

1/4 cup olive oil
4 Tbsp butter, divided
1 medium onion, diced
2 large carrots, grated
1 medium zucchini, grated
1 1/2 lbs boneless, skinless chicken breast or thighs, trimmed and cut into 1-inch pieces
2 tsp salt
1/4 tsp pepper
2 bay leaves
1 cup dry white wine
5 cups chicken broth, heated
2 cups Jasmine or other medium-grain rice
1 head garlic
1/3 cup fresh parsley, chopped
1/2 cup Parmesan cheese, freshly grated, plus more for serving

*If you have a dutch oven, use it. You'll get more flavor from all of the ingredients and the whole dish will cook more evenly.

I didn't have a dutch oven available so I used a large soup pot instead.

Begin by heating the olive oil and 2 Tbsp of the butter over medium-high heat.


When the butter has melted add the onion, carrots, zucchini, and 1 tsp of the salt. Cook until the vegetables have softened, stirring frequently to prevent sticking or burning. This will take about 8-10 minutes.


Once the vegetables are soft add the chicken pieces and season them with the remaining salt and pepper. Cook until the chicken is lightly browned on all sides. I'm sorry for all the steam in the picture, this was the best shot I got out of ten.

Add the bay leaves, increase the heat to high, and pour in your wine. Cook the wine down, scraping the delicious browned bits from the bottom of the pot as you go.


Cut the head of garlic so that all of the cloves are open but still attached. Set it aside for a minute.


Once the wine has mostly evaporated pour in the hot chicken broth and stir in the rice. Then place the head of garlic cut side down in the liquid.


Bring to a boil and then reduce to low. Cover and let it simmer for about 15 minutes, until the rice is fully cooked.


While it's cooking go outside and find a bunny. Okay, that's just me, but there were dozens of bunnies at Nana's house this summer and they weren't even afraid of us so we got pretty close to some of them. Can you find the bunny? He's kind of camouflaged here.


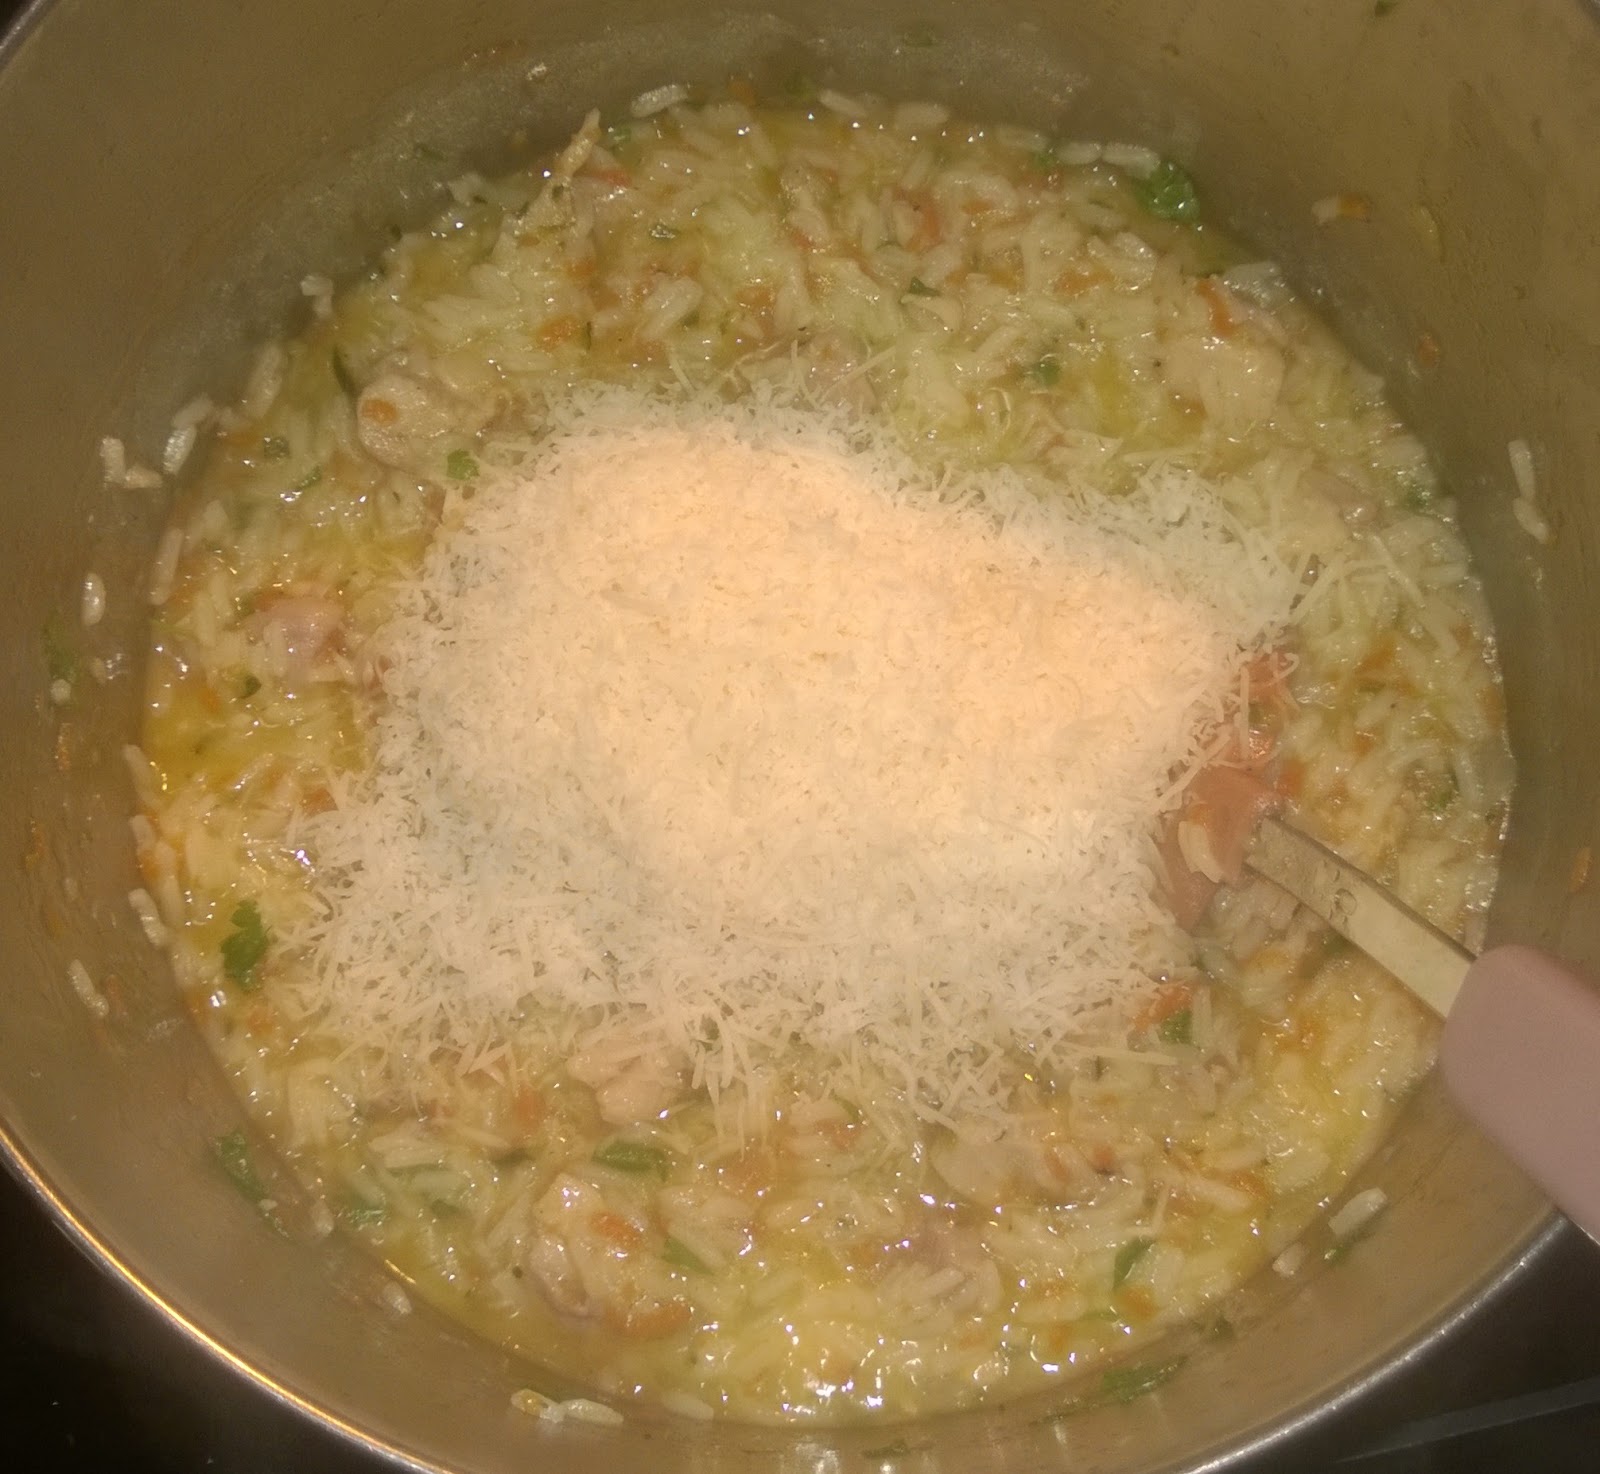
Once the rice is cooked remove the garlic. At this point you can either toss it in the trash or push a few of the cloves out, mash them up, and mix them into the rice. I chose to use about 4 cloves because I like garlic. Add the remaining butter and stir until it melts in. Now stir in the parsley and Parmesan until the dish is creamy.


Serve immediately to prevent the rice from turning to mush.


Add some extra fresh grated Parmesan or chopped parsley if desired.

Monday, June 8, 2015

Sweet and Spicy Chicken Apple Sausage Pasta


Do you ever find something on sale at the grocery store that sounds so good you can't pass it up, but then you get it home and have no idea how to use it? I do it all the time. I saw this chicken and apple sausage for a really great price (under $2 for the 1 lb package) and originally thought it would be great to just fry in the skillet and eat for lunch with some fruit and cheese. Then I got it home and lost my nerve to taste it so I threw it in the freezer until I could find a recipe for it.

Fast forward a month and that sausage seemed to be taunting me from the freezer so I turned to Pinterest. I found this awesome twist on one of my favorite dishes, Spicy Sausage Pasta, and thawed those sausages out to give it a try.

I was still a bit hesitant about the sausages. I didn't know if they would be super sweet or if they would have a different texture from the turkey smoked sausage I usually use. I was also concerned about combining apples with the zesty diced tomatoes and green chilies.

Here's what I discovered:

*Chicken and apple sausage is awesome! It has the same general texture and flavor as turkey smoked sausage with just a tiny bit of sweetness to it. In fact, the sweetness is almost an aftertaste, but a good one.
*Apples play well with tomatoes and green chilies. The sweetness of the apple tempers the spice of the green chilies and the tartness of the tomatoes. In the interest of full disclosure I will add that I used a Gala apple instead of a Granny Smith which probably added more sweetness but it was a sweetness that I personally enjoyed. I might try it again with the Granny Smith for a different texture and flavor, but the Gala worked fine for me.
*The cheese is completely optional. I love cheese, don't get me wrong. I just think it's unnecessary in this recipe. I might feel differently if I could finish it off under the broiler like the original recipe recommends, but I don't have an oven-safe skillet. I'll stick with the cheese-free version for now.

This is a fantastic spin on a recipe I already loved. I will be making this again as soon as that chicken and apple sausage goes on sale, and next time it won't spend nearly two months in the fridge before I get around to cooking it.

Sweet and Spicy Chicken Apple Sausage Pasta

Source: Inspired by Charm

1 Tbsp olive oil
1 lb chicken and apple sausage, sliced
1 small onion, diced (optional)
1 small granny smith apple, chopped (or any other firm, tart apple)
2 cloves  garlic, minced
1 can diced tomatoes and green chilies
1 can chicken broth
1/2 cup milk (the recipe says cream but I used 2% and it was just fine)
8 oz pasta shapes
1 cup monterrey jack cheese, shredded (optional)


Heat the oil in a large skillet over medium heat. Add the sausage and onion and cook, stirring frequently, until the onion is beginning to soften and the sausage is mostly browned, about 5 minutes.


Stir in the apple and garlic and cook for another 1-2 minutes, just until the garlic is fragrant.


Add the diced tomatoes and green chilies, chicken broth, milk, and pasta.


Bring to a boil and then reduce heat to low/medium-low. Simmer for about 15 minutes, stirring occasionally, until the pasta is tender.

Remove from the heat and stir in about half of the cheese. Sprinkle the other half of the cheese on top. If you are using an oven-safe skillet feel free to stick it under the broiler for a couple of minutes to brown the cheese, but if not just give it a few minutes to melt and then serve.


Serve warm with bread to sop up the sauce.

Monday, June 1, 2015

Quick Roasted Chicken Breasts


For the past few years I've been making oven roasted chicken breasts whenever I need cooked chicken for a recipe. Up until about a month ago I used a low and slow method for roasting that left the chicken a little dry. I diced the chicken or shredded it for recipes, including for chicken salad, and I sliced it to make chicken melt sliders and sometimes I would even serve it whole with some mashed potatoes and vegetables.

Then a few weeks ago I found a recipe for these amazing roasted chicken breasts. I hadn't realized how wrong my methods had been! I had never brined chicken breasts. A whole chicken, sure, but not plain, boneless, skinless chicken breasts. I've never trusted the chicken to be fully cooked after only 20 minutes. Even with the meat thermometer I'm never completely sure it's done.

I decided to have faith and give this recipe a try and I was overjoyed with the results! This is without a doubt the juiciest chicken I've ever cooked. Even with the 15 minute brining time it still takes less than an hour to get it to the table. It's delicious all by itself and also works great in other recipes. It's my new go-to method for cooking chicken for sure.

Quick Roasted Chicken Breasts

Source: Gimme Some Oven

4 boneless, skinless chicken breasts
2 cups water
1-2 Tbsp salt
1 Tbsp olive oil or melted butter
1 Tbsp all purpose seasoning (or seasonings of your choice, Italian seasoning is one of my favorites)


Begin by placing the chicken in a large mixing bowl or a gallon size zip top plastic bag. In a 2-cup measuring cup combine the water and salt and mix until the salt dissolves. Pour the water in the bowl or bag with the chicken and set aside for 15 minutes or up to 6 hours.

This is called BRINING and it helps the chicken hold its moisture when you cook it. If you're in a hurry you can go with the minimum of 15 minutes. It really doesn't need more than that but if you want really moist, tender, and flavorful chicken you can go for up to 6 hours.

When you're finished brining the chicken preheat the oven to 450 degrees. Spray a baking dish with vegetable oil spray and set aside. Lay out some paper towels and pat each chicken breast dry before placing it in the baking dish.


Brush both sides of each chicken breast with olive oil or melted butter. This will also help the chicken stay moist and will help the seasonings stick to the surface. Melted butter gives a better flavor, especially if it's salted butter, but olive oil works just as well and is probably better for you.


Season both sides of each chicken breast with all purpose seasoning or seasoning of your choice (remember to salt the chicken if your seasoning mixture does not contain salt) and roast in the preheated oven for 15-20 minutes. If, like me, you don't trust the chicken will be fully cooked in such a short time you can use your thermometer to check it. I was skeptical but it's done just fine all three times that I've used this method.


Once the chicken is cooked remove it from the oven and cover loosely with foil. Let the chicken rest for at least 10 minutes before serving.


You can eat this as is or use it for another recipe but be sure to let it cool completely before you put it in the fridge. It's great with mashed potatoes!

Monday, March 30, 2015

Honey Mustard Glazed Chicken


I seem to have trouble keeping chicken from going all dry and overcooked on me. I always seem to worry that the chicken won't be done enough and wind up cooking it far too long. I have tried using a meat thermometer and it helps to know the temperature of the meat, but I'm still left wondering if the reading was accurate and if I placed the probe in the correct area of the chicken.

The solution seems to be a rather unhealthy one, but it works well nonetheless. This chicken is basted in a mixture of melted butter, honey, and mustard. The butter keeps the chicken from losing all of its moisture as it cooks as well as adding flavor. This chicken was the most delicious, juicy chicken I've ever cooked. I guess Julia was right about that butter!

Honey Mustard Glazed Chicken

Source: Worlds Best Recipes

4 boneless, skinless chicken breasts
1/3 cup butter, melted
1/3 cup honey
2 Tbsp yellow mustard
1/4 tsp salt
pepper

Preheat the oven to 350 degrees and spray a baking dish with vegetable oil spray.


Place the chicken in the prepared baking dish and sprinkle with pepper. Set aside. (Yes, this is only two chicken breasts. I cut the recipe in half when I made it because Aaron and I can't eat 4 whole chicken breasts. Usually I split one with Bailey and he eats half of another, then I have half of one leftover for lunch the next day.)


In a small bowl combine the melted butter, honey, mustard, and salt.


Stir until well combined.


Drizzle the chicken with about 1/4-1/3 of the honey mixture, enough to coat the entire surface of the chicken breasts.


Bake at 350 degrees for 1 hour, adding more of the honey mixture every 15-20 minutes.


Serve warm, preferably with mashed potatoes or rice and veggies.